
powertokens platform, fill in the platform endpoint URL, API Key, and model ID in WorkBuddy’s model configuration, test the connection, and you’re ready to go.
Prerequisites
- A registered
powertokens platformaccount with an API Key. - WorkBuddy client installed (this guide is based on WorkBuddy 5.6.2).
- The model ID you want to use (e.g.,
glm-5.3,MiniMax-M3), which you can find in the platform model list.
Configuration Steps
1. Open the model selector
In the WorkBuddy main interface, click the ⚡️ Fast model selector at the bottom right to open the model dropdown menu. At the bottom of the dropdown, click Configure Custom Model.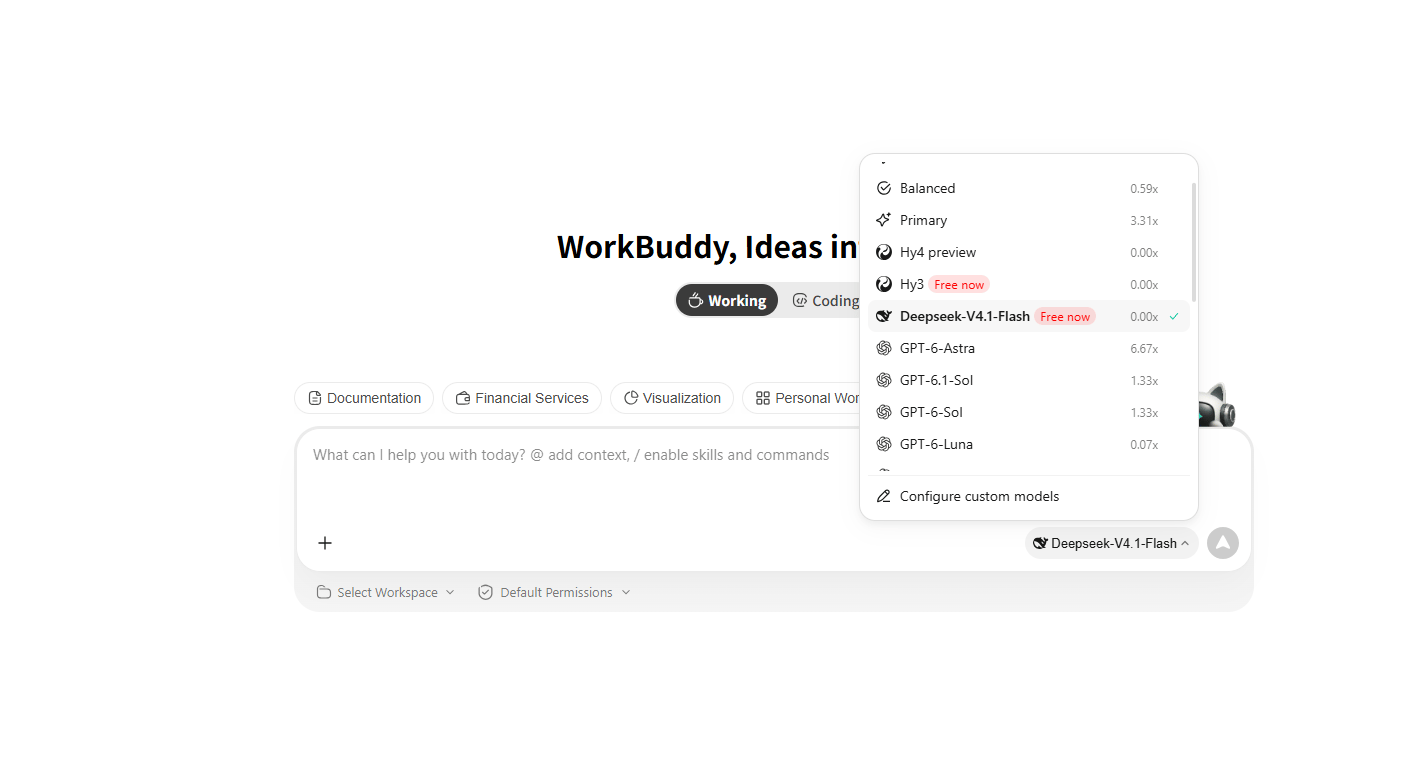
2. Select custom provider
In the Add Model dialog, select Custom from the provider list.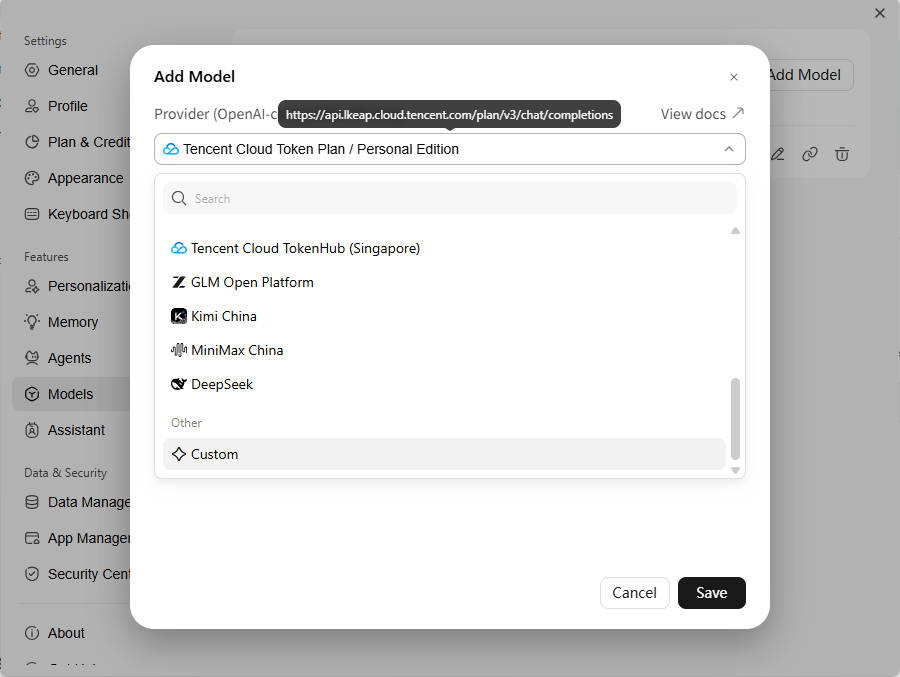
3. Fill in endpoint details and test connection
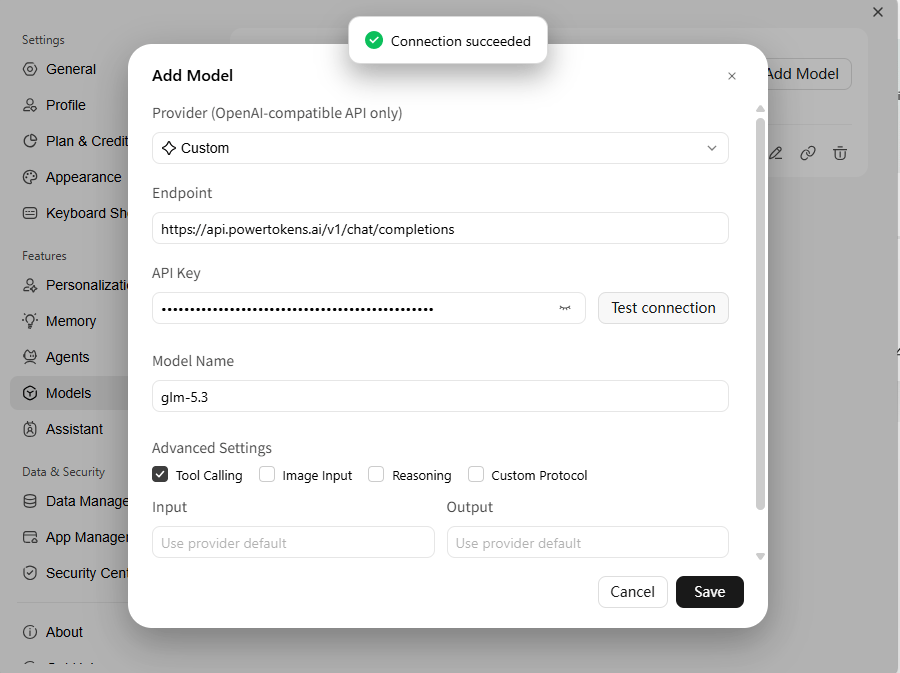
After selecting Custom, fill in the form with the following:
After filling in the details, click Test Connection. Once the Connection Successful badge appears at the top, click Save.
4. Start using
After saving, select your newly added custom model from the model selector menu to start using it through thepowertokens platform in WorkBuddy.
Recommended Models
Limitations
- WorkBuddy custom models only support the OpenAI-compatible Chat Completions endpoint. Image generation, video generation, voice, and other task models are not supported.
- The Tool Calling option in advanced settings depends on model capabilities. Verify with real tasks.
- Do not expose real API Keys in documentation or screenshots.