> ## Documentation Index
> Fetch the complete documentation index at: https://docs.powertokens.ai/llms.txt
> Use this file to discover all available pages before exploring further.
# WorkBuddy Integration Guide
> Configure a custom model in WorkBuddy to connect to the powertokens platform via the OpenAI-compatible endpoint.
WorkBuddy is an AI office assistant client that supports connecting to third-party OpenAI-compatible endpoints via custom models. To integrate with the `powertokens platform`, fill in the platform endpoint URL, API Key, and model ID in WorkBuddy's model configuration, test the connection, and you're ready to go.
## Prerequisites
* A registered `powertokens platform` account with an API Key.
* WorkBuddy client installed (this guide is based on WorkBuddy 5.6.2).
* The model ID you want to use (e.g., `glm-5.3`, `MiniMax-M3`), which you can find in the platform model list.
## Configuration Steps
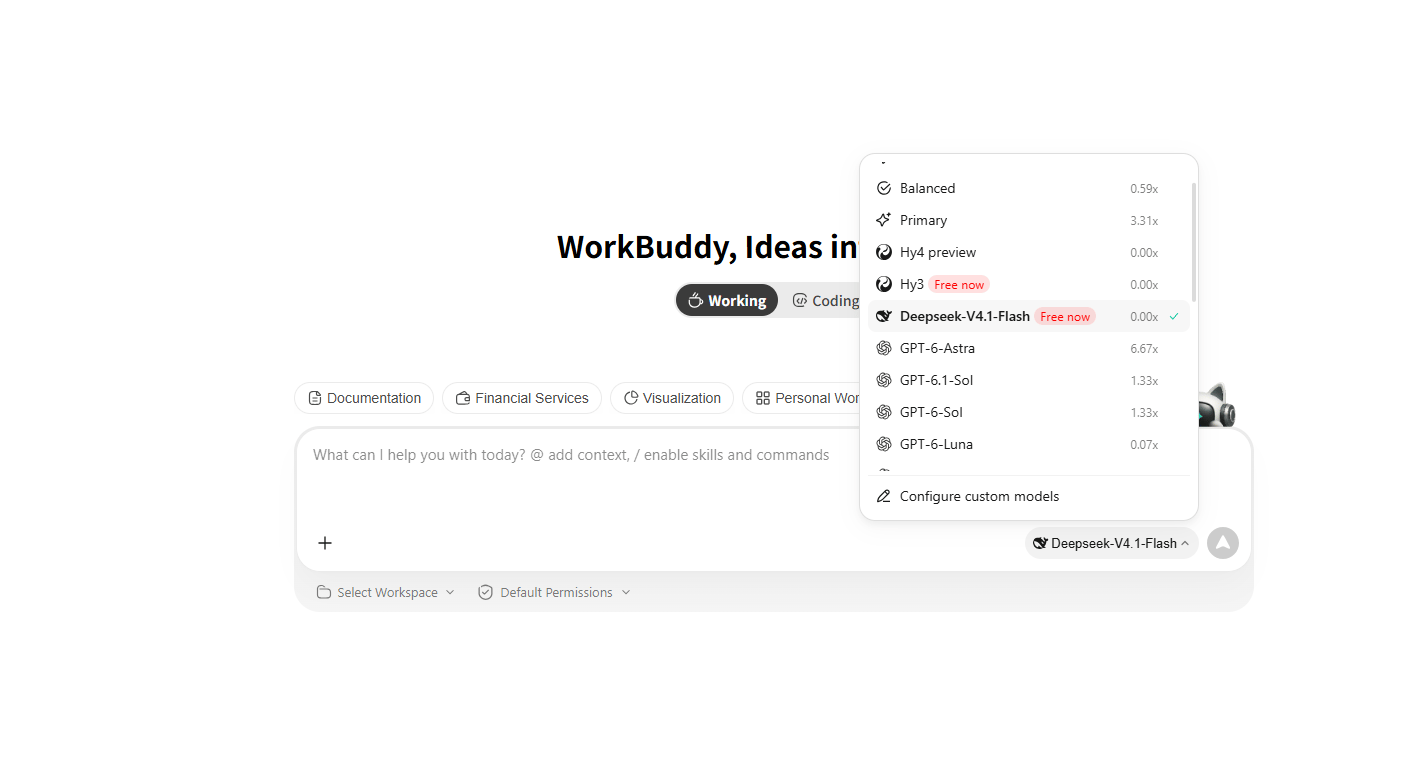
### 1. Open the model selector
In the WorkBuddy main interface, click the **⚡️ Fast** model selector at the bottom right to open the model dropdown menu.
At the bottom of the dropdown, click **Configure Custom Model**.
 ### 2. Select custom provider
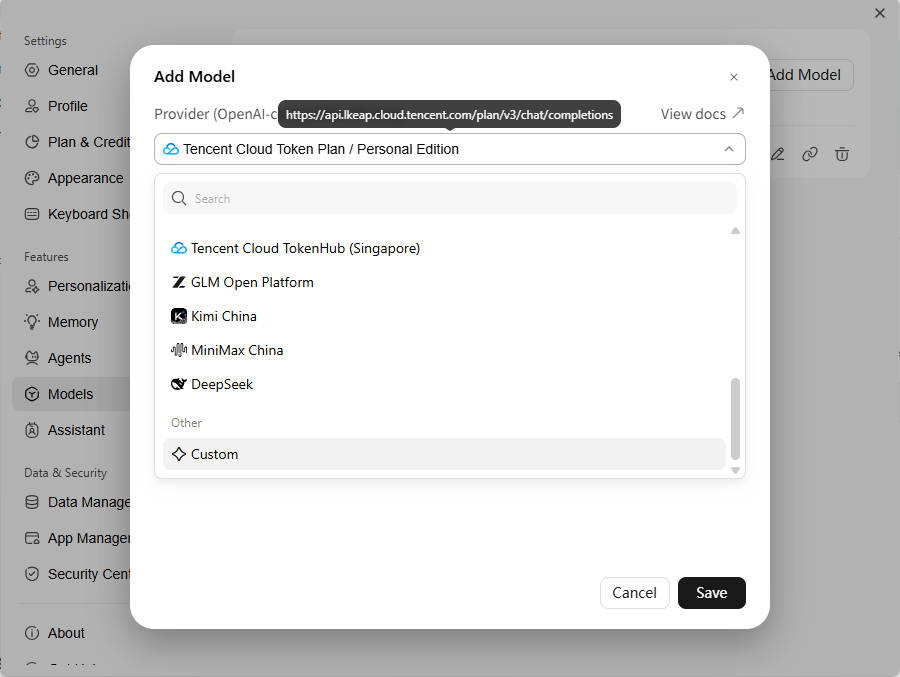
In the **Add Model** dialog, select **Custom** from the provider list.
### 2. Select custom provider
In the **Add Model** dialog, select **Custom** from the provider list.
 ### 3. Fill in endpoint details and test connection
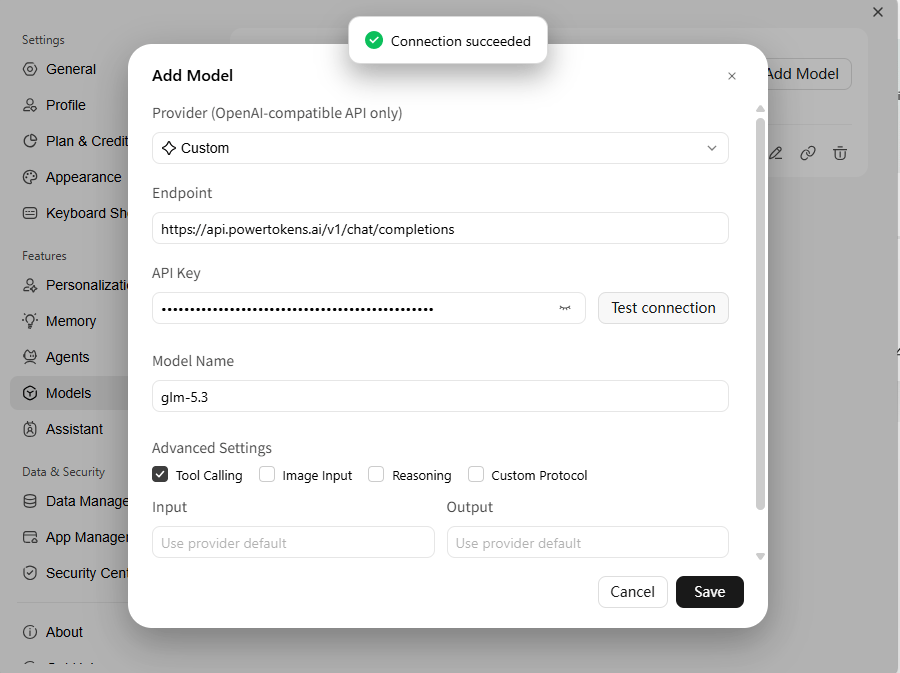
After selecting Custom, fill in the form with the following:
| Field | Value |
| - | - |
| **Endpoint URL** | `https://api.powertokens.ai/v1/chat/completions` |
| **API Key** | Your `powertokens platform` API Key |
| **Model Name** | A platform-supported model ID, e.g., `glm-5.3` |
After filling in the details, click **Test Connection**. Once the **Connection Successful** badge appears at the top, click **Save**.
### 3. Fill in endpoint details and test connection
After selecting Custom, fill in the form with the following:
| Field | Value |
| - | - |
| **Endpoint URL** | `https://api.powertokens.ai/v1/chat/completions` |
| **API Key** | Your `powertokens platform` API Key |
| **Model Name** | A platform-supported model ID, e.g., `glm-5.3` |
After filling in the details, click **Test Connection**. Once the **Connection Successful** badge appears at the top, click **Save**.
 ### 4. Start using
After saving, select your newly added custom model from the model selector menu to start using it through the `powertokens platform` in WorkBuddy.
## Recommended Models
| Upstream Provider | Model ID |
| - | - |
| Zhipu | `glm-5.3`, `glm-5.2`, `glm-5-turbo` |
| MiniMax | `MiniMax-M3` |
| DeepSeek | `deepseek-v3-2-251201` |
## Limitations
* WorkBuddy custom models only support the OpenAI-compatible Chat Completions endpoint. Image generation, video generation, voice, and other task models are not supported.
* The **Tool Calling** option in advanced settings depends on model capabilities. Verify with real tasks.
* Do not expose real API Keys in documentation or screenshots.
This documentation is built and hosted on [Mintlify](https://mintlify.com), a developer documentation platform.
### 4. Start using
After saving, select your newly added custom model from the model selector menu to start using it through the `powertokens platform` in WorkBuddy.
## Recommended Models
| Upstream Provider | Model ID |
| - | - |
| Zhipu | `glm-5.3`, `glm-5.2`, `glm-5-turbo` |
| MiniMax | `MiniMax-M3` |
| DeepSeek | `deepseek-v3-2-251201` |
## Limitations
* WorkBuddy custom models only support the OpenAI-compatible Chat Completions endpoint. Image generation, video generation, voice, and other task models are not supported.
* The **Tool Calling** option in advanced settings depends on model capabilities. Verify with real tasks.
* Do not expose real API Keys in documentation or screenshots.
This documentation is built and hosted on [Mintlify](https://mintlify.com), a developer documentation platform.